Setting up a Deployment in Rancher
Introduction
This guide provides a step-by-step walkthrough for setting up a new deployment in Rancher. Optional steps, such as creating a namespace, are clearly marked, so you can skip them if they are already set up.
Creating a Deployment
1. Create a Namespace (Optional)
Namespaces are used to organize your resources. If the namespace already exists, skip this step.
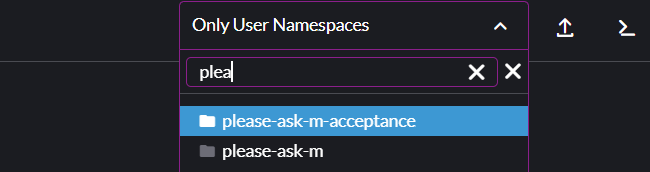
Navigate to Projects/Namespaces via Cluster -> Projects/Namespaces.
Click Create Namespace and provide the following details:
Name: project-name{-environment}with environment options:- No suffix for production (e.g.,
project-name). accortstfor other environments. (e.g.,project-name-acc)
- No suffix for production (e.g.,
- Select a project:
default(for production)acceptance
2. Filtering on the Namespace
Use the rancher namespace dropdown to select the namespace you wish to create the Deployment for. It is reccomended to also select a namespace for a project with a similar setup. This is used to compy some generic resource to your namespace.
3: Docker secrets Configuration
Secrets store sensitive information like Docker credentials. If setting up a new namespace, we need to copy the docker credentials to make sure we can pull our docker images. Check if the secret already exists in your namespace, if so, you can skip this step.
Navigate to Secrets via Storage -> Secrets. To clone the docker secret for another namespace and click the three dots next to the secret -> "Clone". Make sure to set the following:
Namespace: Select the desired namespace.Name:your docker secret name.
4. Deployment & container Setup
Deployments define how your application runs.
4.1 Create a Deployment
Navigate to Deployments via Workload -> Deployments. Click Create and set the following:
Namespace: Select the desired namespace.Name:project-name. Example:my-project-acc.
4.2 Container Configuration
Now, we need to setup the container with our application. Note, a deployment can have multiple containers. In this guide, we're setting up a deployment with a single container.
Select the first container in the tab's shown. When setting up a new deployment, this is called container-0. To set up your container correctly, set the following attributes. If it's not listed here, use the default:
Container name, define a name for the container (e.g.my-project-api).Container image, use the correct container image for your project (e.g.pleaseaskm/my-project:edge).Pull secrets,your docker secret name.Networking-> pressAdd Port or Service. Do this for each port you want to expose.Service Type,Cluster IPName, leave this empty.Private container port, use the port you want to expose (e.g.3000,80,8080)Protocol, TCP.
Command(optional), if you want to deviate from the default command in your docker container, set up the following:Command, the root command which should be used. (e.g.php,poetry,node)Arguments, the arguments for the command which will be run. (e.gbin/console run:cron,run python cronjob.py,cronjob.js)
4.3 Container resource management
Because our entire cluster is a shared environment, all containers should have sensible resource limits. These ensure optimal performance and prevent heavy resource usage peaks that could impact other projects. To set this up, use: Container resource management.
4.4 Environment Configuration
Add environment variables specific to your project. These differ per project and are used to configure your application. You should know yourselves what variables should be set here. You can set them in your container directly, which makes the management of a single container easier. You can also create a ConfigMap or SecretMap to make managing variables for multiple containers easier.
4.4.1 Shared Environment Variables (Optional)
To give our containers the ability to share variables, we can use ConfigMaps and Secrets to inject them into our container. This works for all workload types (e.g. Deployments, CronJobs, etc...). A ConfigMap contains our normal variables while the Secret contains secrets. The setup of both is very similar, both will be covered in this section.
Navigate to Storage -> ConfigMaps/Secrets. When creating a Secret, select the Opaque type. Create or edi the define variables as you would within your Deployment. Please note, after changing variables here, you need to redeploy your deployment for the changes to take effect.
We have 2 ways to inject the variables into our container. Firstly, edit your workload and navigate to the Environment Variables section. Then use one of these to inject the variables:
- Entire ConfigMap/Secret: Select type
ConfigMap/Secret, leave prefix blank, and choose the ConfigMap. - Single Key: Select
ConfigMap/Secret Key, set a variable name, choose the ConfigMap, and select the key.
5. Service Discovery
Services define how components communicate. The service for our workload will be automatically created when setting up the Networking of your workload. We still need to setup services to communicate to shared services like the mailserver or database.
Navigate to Services via Service Discovery -> Services. Click Create and set the following:
Namespace: Select the desired namespace.Name: The name of the service. This is the name which your application should use (e.g.mysql-service)External Name: Provide the DNS name (e.g.mysql-service.shared-services.svc.cluster.local)
Here are some common examples:
MySQL: mysql-service.shared-services.svc.cluster.localMailserver: mailserver.shared-services.svc.cluster.localRedis: redis.shared-services.svc.cluster.local
6. Ingress setup
To make sure our workload is available online, set up an ingress resource. A guide on setting up an ingress can be found here: Setting up an Ingress in Rancher